Root
your Sony Xperia using rooting tool kit it’s very easy method as compare t o
other method without any troubles. its safe and easiest
method.
Tools
Requirements:-
1.
Charging Your battery up 80%.
2.
Original USB Cable
3.
Sony Xperia U Driver. Click Here to Download
4.
Root_with_restore_by_bin4ry_v30.zip:- Click here to Download
5.
Enable USB Debugging
(Menu--->Setting----->Development-----> USB Debugging Box
Rooting Process for Sony Xperia U.
1.
Install Sony Xperia U driver in your PC or
Laptop.
2.
Enable USB debugging on your device.
3.
Go to Menu--->settings -- > Development
--- > USB debugging check it.
4.
Stop Firewall & Antivirus During the root
process.
5.
Extract the Root_Unroot_By_Bin4ry_Root Tools in
a folder.
6.
Now Connect your Sony Xperia U to your computer.
7.
Change the connection mode USB Storage to Media
Device.
8.
Open the Root_with_restore_by_bin4ry_v30 Tools
folder.
9.
Then Run Runme.bat file. (Do not run as
administrator.)

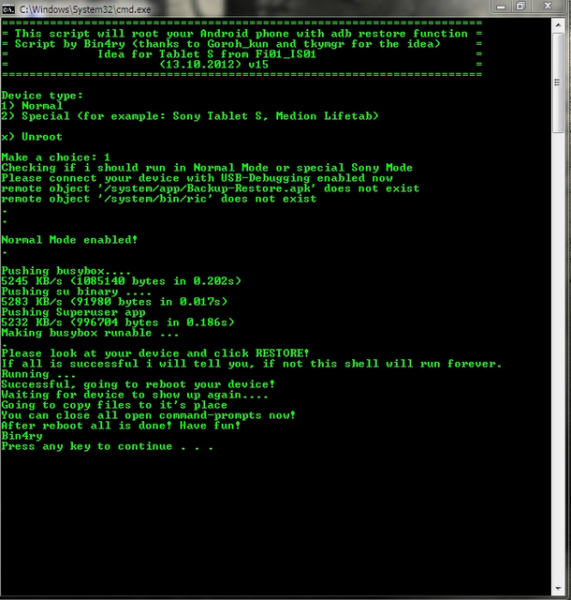
10. Open Command Prompt with green letters.
11. Follow on the screen instruction carefully.
12. Root
your Sony Xperia U then Press "1" and enter.It usually takes
1-2 minutes maximum.
13. Unroot
your Sony Xperia U then Press "x" and enter.It usually takes
1-2 minutes maximum.
14. Note: - Your device might reboot itself. So
don’t worry and don't remove your device till the Bin4ry says it is done
because it can lead to bricked Sony Xperia U.
15. Your device will reboot during the
process after which Bin4ry will copy some files to your device.
16. Now you have successfully rooted your
devices.
Enjoy
Your Sony Xperia U Successfully Rooting.
Share This Link to Your all Friends.
Note: - I am not responsible if you make any mistake and damage or
any other problem your devise.


0 Response to "How to Root Sony Xperia U."
Post a Comment